1.Clay
Put a bit of bentonite or Montmorillonite clay on it! Clay is very helpful for itching and a number of other skin issues such as acne. It particularly helps heal venomous stings and bites, like from bees, wasps and spiders. The clay helps draw the venom out of the skin, which will help relieve the pain and let the sting heal more quickly.
Use virgin, untreated clay, such as this one. Green clay (often called montmorillonite or bentonite clay) is the most powerful type. (For more information on the amazing healing power of clay, I highly recommend reading The Clay Cure by Ran Knishinsky).
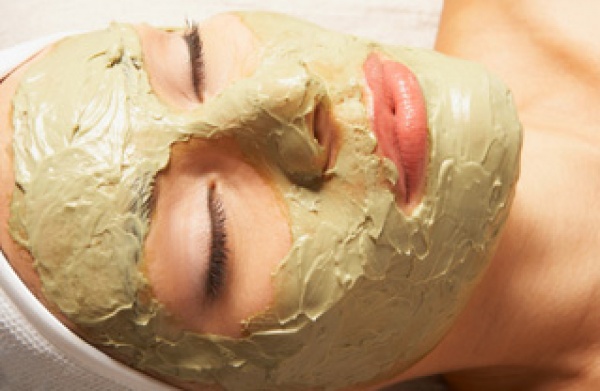
How to use it: Mix the clay in a bowl or cup with a bit of filtered water until it has a creamy consistency like peanut butter (like in the picture at the top of the page). Then, just dab the clay paste onto itchy areas, let it dry, then rinse or peel it off.
How to do a clay pack: Spread the clay on a piece of clean, porous fabric (i.e., wool, muslin, cotton, flannel). Then place the clay-covered cloth to the irritated area, with the clay directly touching the skin (see the picture on the right). You can use bandaging tape or wrap it in plastic wrap to keep the cloth in place and protect your clothing and furniture. Keep the clay pack on for about 4 hours, or until the clay is hard and dry.
2.Apple Cider Vinegar
This isn’t the first time I’ve sung the praises of the uber-versatile ACV, and I suspect it won’t be the last. Apple cider vinegar is an effective antiseptic, anti-fungal and anti-bacterial agent that relieves itching, especially itching associated with dry skin (for example: sunburns and dandruff). It’s also popularly used for pets with dry, itchy skin as well, by adding a few cupfuls to their bath water.
How to use it: Just put a few drops of it onto a cotton ball or washcloth and dab it on to the affected area. Use raw, organic, unfiltered apple cider vinegar (Bragg’s is a good brand) with the “mother,” a strand-like sediment floating at the bottom of the bottle that contains raw enzymes and beneficial bacteria.
3.Clay + Apple Cider Vinegar
Combine the anti-itch properties of both of these skin soothers at the same time!
How to use it: Follow the instructions for using clay topically or as a clay pack, just substitute apple cider vinegar instead of water when making your clay. It will fizz up a bit, so just add a tiny amount of vinegar at a time until you reach the desired consistency.
4.Peppermint Leaves
Peppermint is great for bug bites and itching, as it provides a cooling sensation that’ll give you welcome relief.
How to use it: The quickest, easiest way is to crush up the leaves and rub the peppermint directly onto the skin. You could even freeze the crushed peppermint leaves into ice cubes for a cooling double-whammy, as the cold of the ice cubes also helps to numb the affected area and bring down swelling and inflammation. Always use clean, filtered water.
5.Fresh Basil Leaves
Basil leaves contains anti-itch compounds called camphor and thymol. This is my personal go-to trick for bug bites, as it’s so quick and easy. Plus, rubbing the leaf onto the skin satisfies the compulsive urge to scratch.
How to use it: Crush up the leaves and rub directly onto the skin.
6.Aloe Vera
We love aloe vera for just about every kind of skin irritation. Aloe is probably best-known for its ability to heal sunburns, but it’s extremely versatile as it soothes the skin and relieves swelling and irritation. If you live in Southern California, there’s probably an 85% chance it’s already growing in your yard.
How to use it: Break off a leaf from the plant, and cut it open lengthwise from top to bottom with a knife. Scoop out the gooey gel inside, and rub it directly onto irritated skin. If you have extra left over, you can keep it refrigerated in an airtight container for up to a week.
7.Fruit Peels
Silvana, the Gerson Institute’s Director of Education, also turned me on to a cool trick. Rub bug bites with a banana peel. Another Gerson staffer also suggested watermelon rind.
This is a great way to re-purpose kitchen scraps that might otherwise be thrown out! But, this method does have a potential drawback: the fruity scent may attract bugs. This may be a better choice for using indoors.
How to use it: Rub peel or rind onto the affected area.
8.Oatmeal
Oatmeal contains compounds called avenanthramides that reduce inflammation. This is a popular trick that’s been around for ages; I can remember my mom making me take oatmeal baths when I had chicken pox as a little kid. It’s also commonly used for poison ivy and eczema. You can add oatmeal to your bath, or make a poultice.
How to use it: To make an oatmeal poultice, add a bit of water to a cup or bowl of plain, organic, uncooked oatmeal (ground or steel-cut work best for this), then let it sit for a few minutes until it reaches a paste-like consistency. Apply the paste to the itchy area as needed.